Adding Props: Meditation Cushions
All photos in this post by Dean Tumibay
The yoga world is full of many tools that are used to both enhance and support your practice. The “Prop it like it’s hot” series will review a number of different yoga props, and how practitioners can use them as a base for modifying, or in some cases, deepening your asana practice. For this portion of the series, we’re reviewing meditation cushions.
While the name suggests that this prop is used primarily for meditation, we’ll review how a meditation cushion can also help to enhance more active postures for both beginner and advanced practitioners.
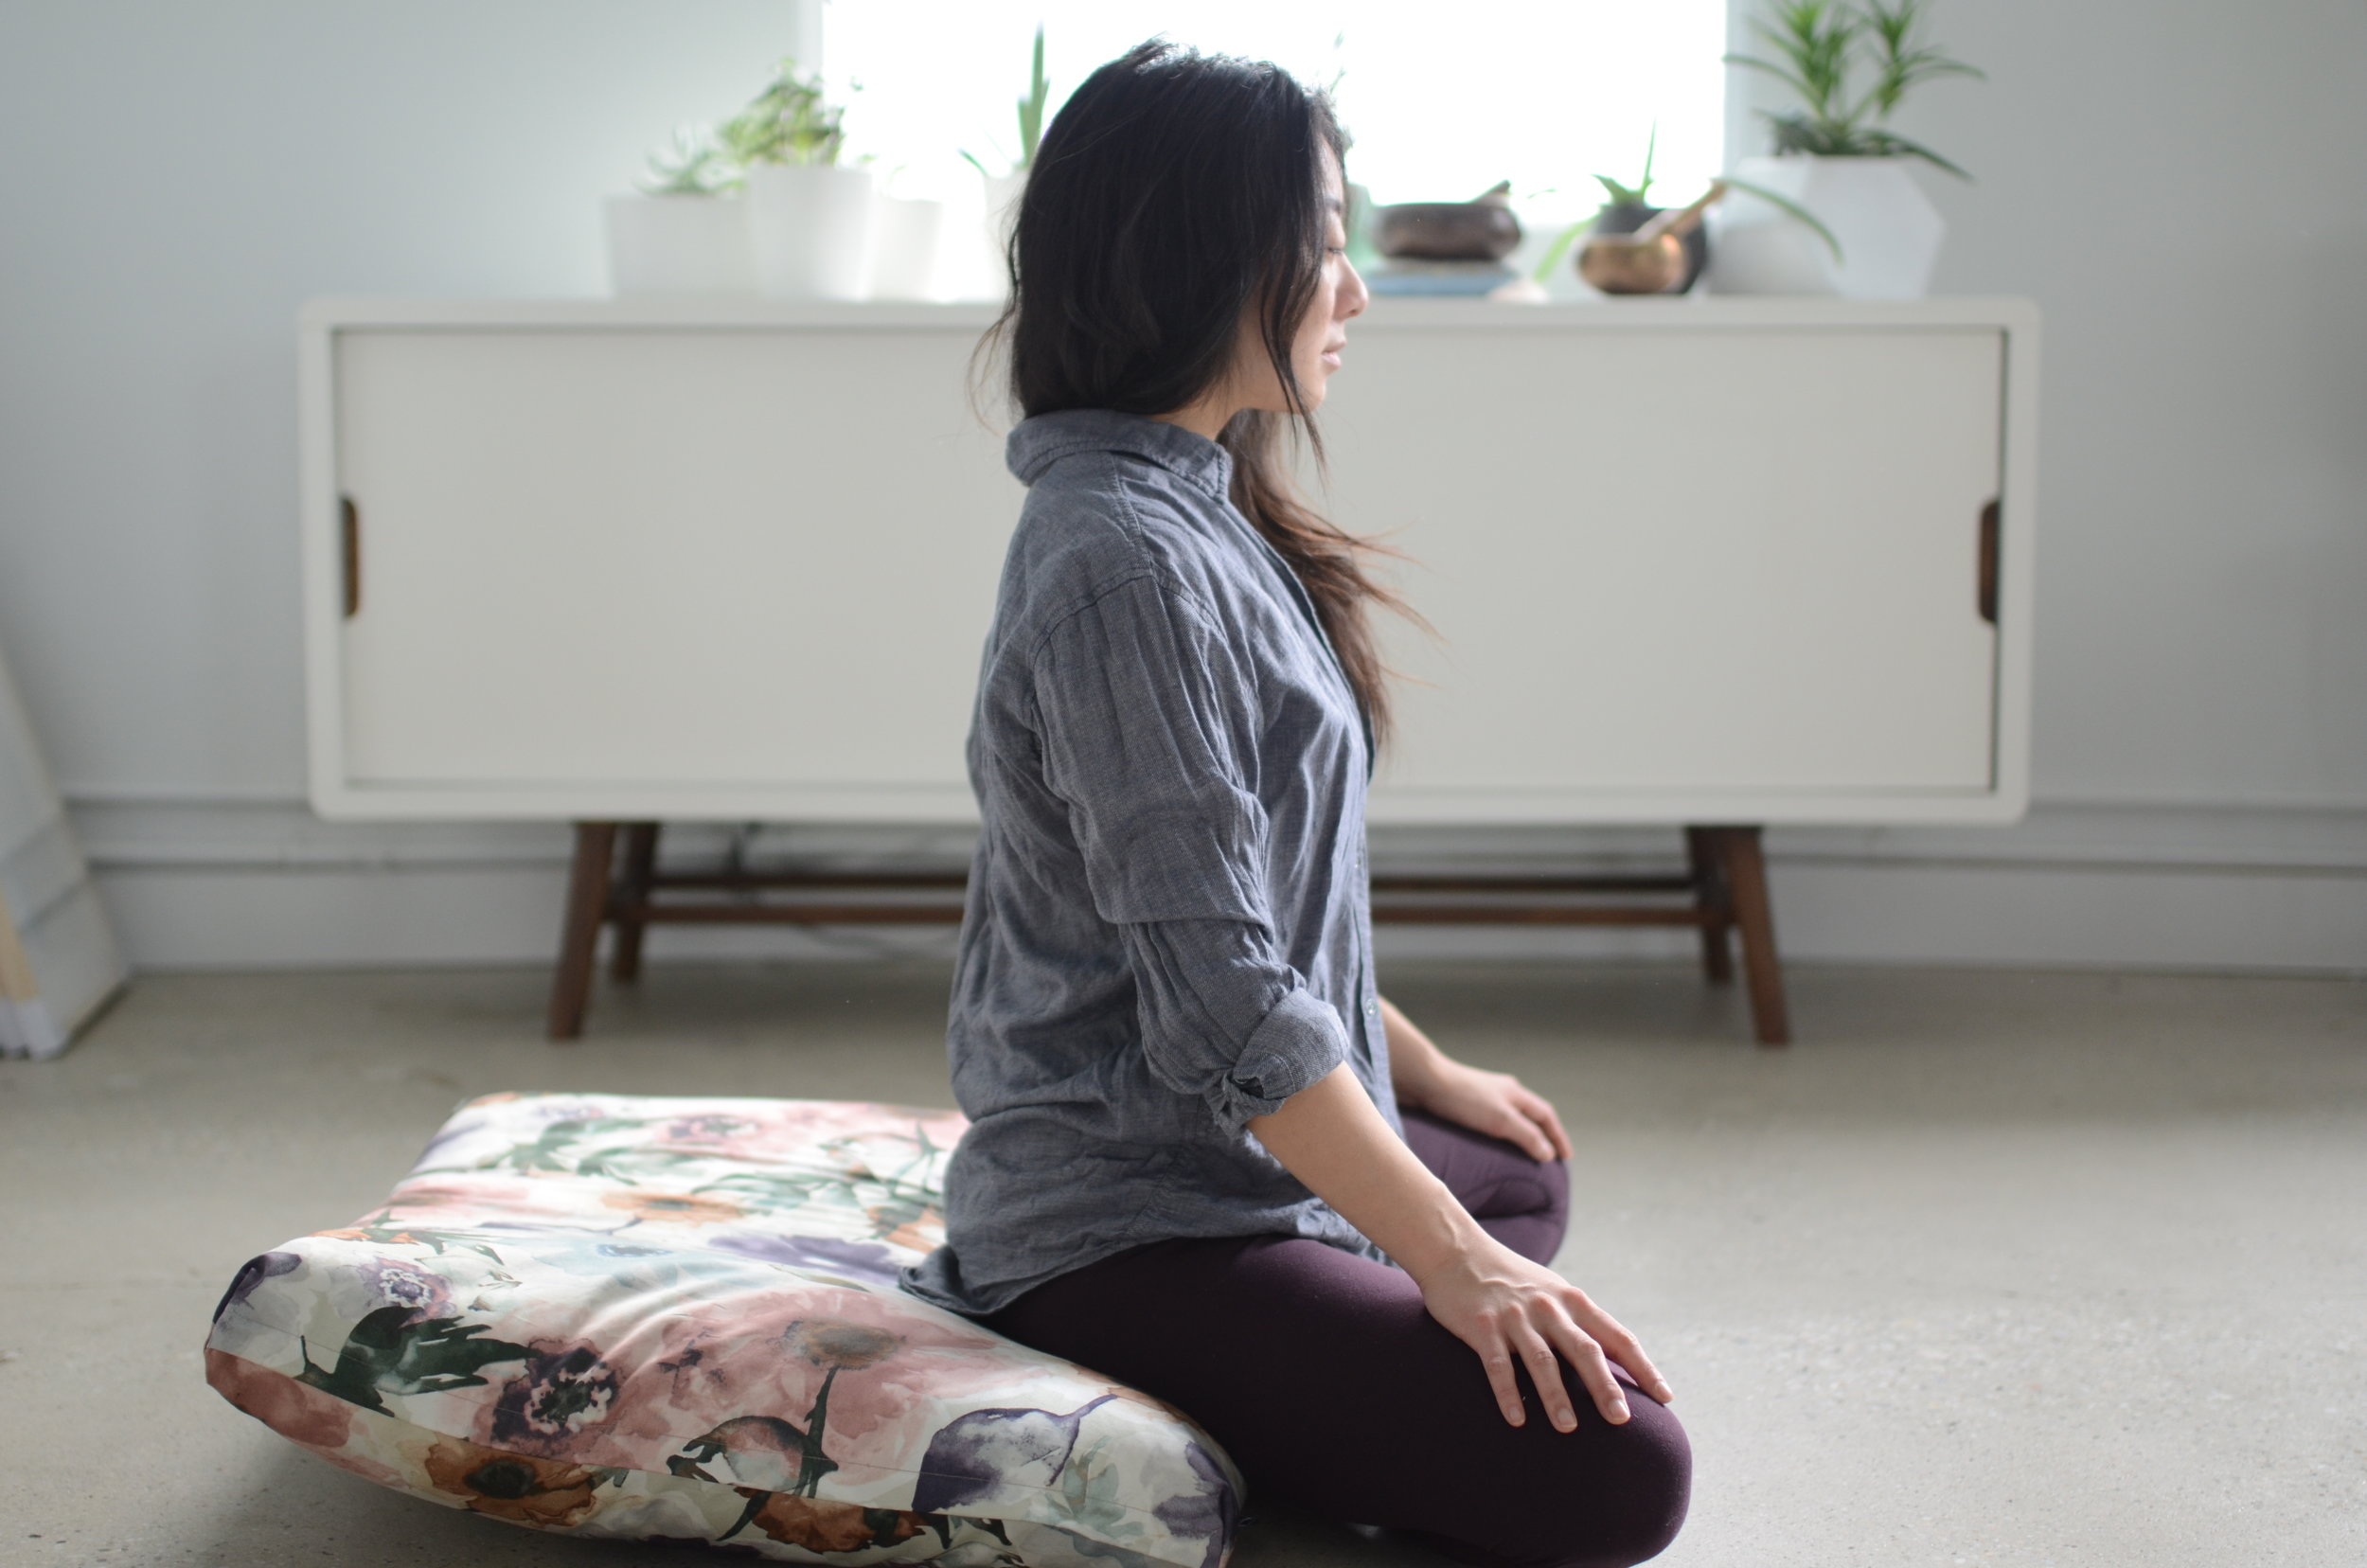
Using the cushion for a seated meditation
Often, meditation is challenging for people who are starting out, as people find that there are too many distractors to tune out. One challenge is finding a comfortable position to sit in for an extended period of time. Meditation cushions in this regard provide a perfect balance between a firm surface that provides appropriate support for the sacrum, but enough compliance to contour to the shape of your pelvis. While many people assume you sit in the middle of a meditation cushion, we actually encourage practitioners to sit on the edge, allowing the cushion to slightly elevate the posterior surface of the pelvis. This encourages a slight anterior pelvic tilt. By sitting on the edge of the cushion, and allowing the hips to roll forward slightly, we encourage the natural curvature of the lumbar spine into lordosis, allowing us to comfortably stack our shoulders over our hips.
Using the cushion for forward folds
Tight hamstrings and general tension in the pelvic region is a common ailment in a culture conditioned to sit for long periods of time. In these cases, seated forward folds, such as paschimottanasana as well as baddha konasana with a forward fold can be particularly challenging. As it does with a seated meditation, sitting at the cushion’s edge can facilitate a gentle anterior pelvic tilt, encouraging a soft forward fold while maintaining proper alignment of the lumbar spine. This encourages proper alignment in our forward folds, and prevents the tendency towards rounding the lower back.
Using the cushion for twists
The compliance of the meditation cushion allows it to conform to our pelvis, but it’s equally firm nature provides enough support to allow us to remain grounded in our posture. In seated twists, due to tightness in our hips, often times one side of our pelvis will have difficulty remaining connected to the earth resulting in a lopsided seat that is unstable to perform a twist from. With the help of a cushion, we can have an even distribution of weight through our base to allow us to focus on a deeper rotation through our spine.
Using the cushion for active postures
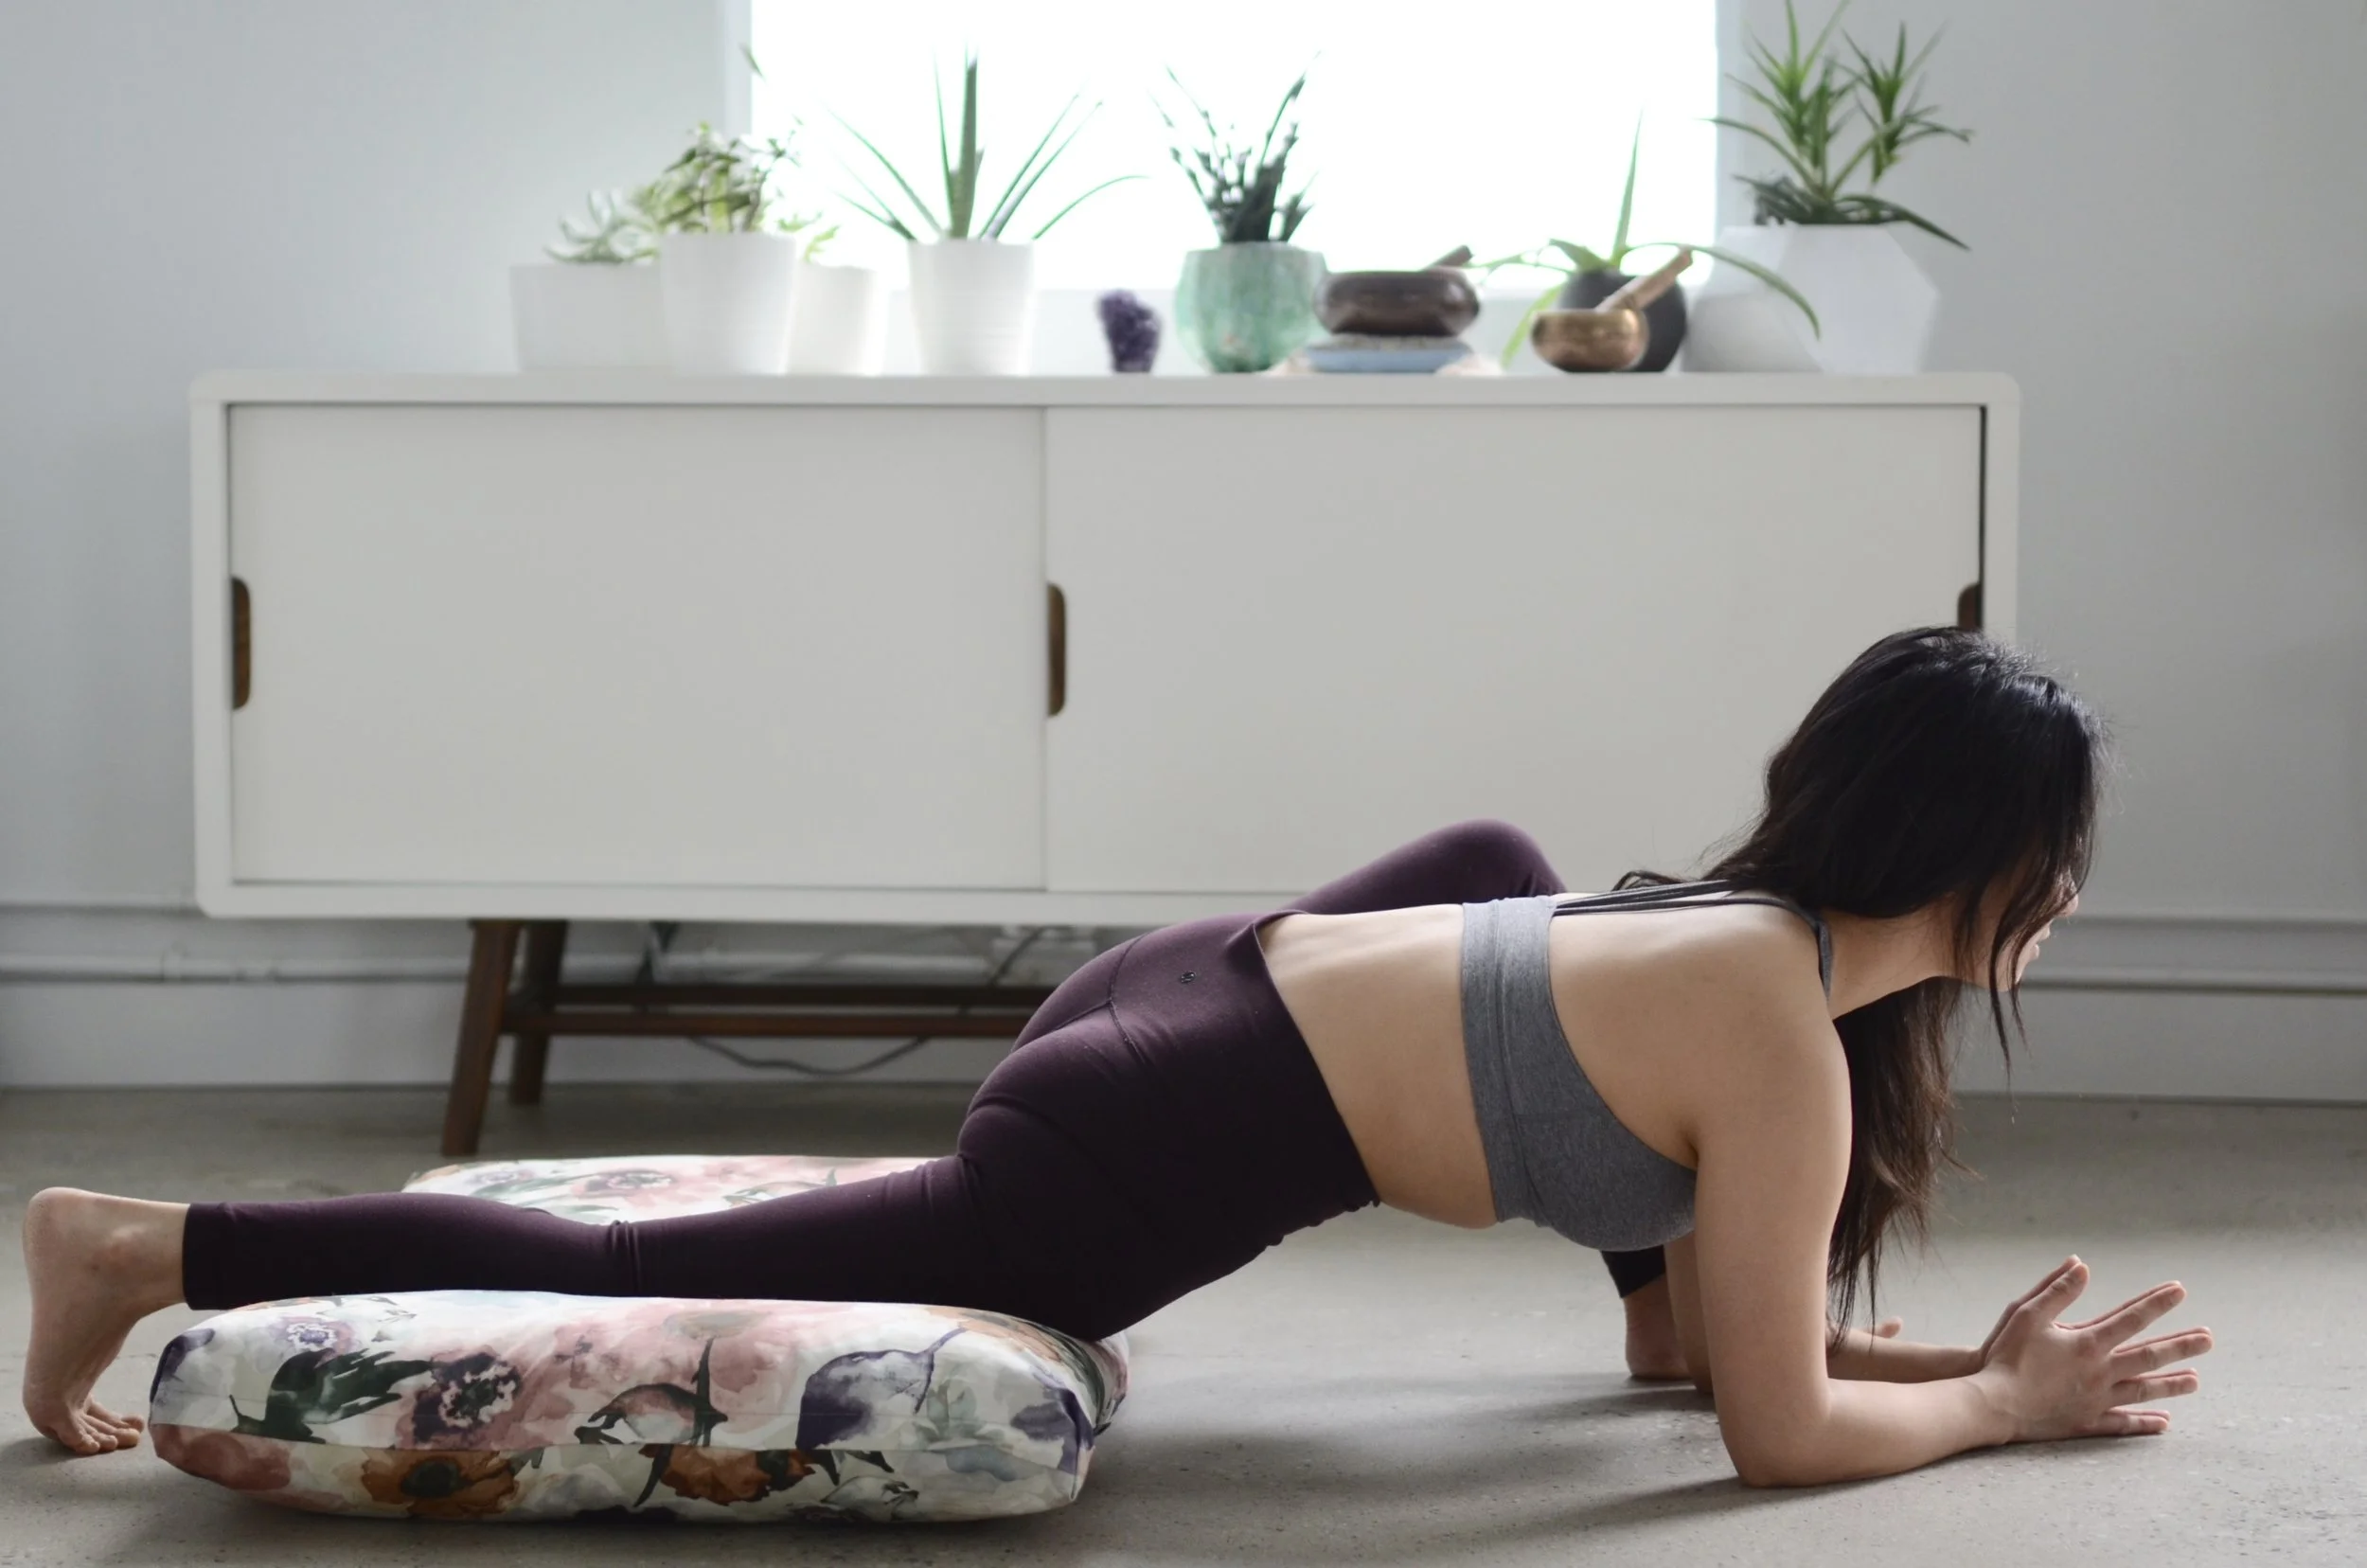
Many yoga postures require us to bear weight through our knees, which for many can be an uncomfortable experience. We can maintain the integrity of these postures, such as a low crescent lunge, with our knees propped on a comfortable surface like a meditation cushion that allows us to go deeper into the posture, without having to endure pain during the hold. For deep postures such as the front splits (hanumanasana) or any modified variation, the meditation cushion propped under our back leg allows for support through that limb, but gives space for the pelvis to go even deeper into the asana.
We have meditation cushions available for purchase at both our south and north locations. If you have experience using meditation cushions or meditation props in your practice, please feel free to email info@yogalifestudios.ca with your experience! If there are any specific props you’d like to see in our “Prop it Like it’s Hot” series, again please contact us via info@yogalifestudios.ca or our various social media streams (twitter, Instagram, Facebook).
Foundation Friday: Anjaneyasana
This post is an instalment in a series that delves into the basics of yoga—looking at its postures (asana), breath (pranayama), philosophy, and all the other essentials—giving you the foundations upon which to build a solid practice. Today's focus will be on Anjaneyasana, or Crescent Lunge Pose.
Foundation Friday: Anjaneyasana
Pose, or Asana "Crescent Lunge Pose" ahn-jahn-eh-yass-a-nah
Anjaneyasana, or Crescent Lunge Pose is a posture you'll find in nearly every yoga class. You might find yourself in an Anjaneyasana variation with your back knee lifted or lowered, toes tucked under or not, perhaps in a slight back bend, or with your arms reaching back like you're a runner about to leap off your starting block. Lunges strengthen and stretch the feet, legs, hips, core, back, and even the shoulders and arms—this posture gets your whole body involved!
Anjaneyasana may help…
- Relieve symptoms of sciatica
- Build stabilizing muscles in your legs
- Open through your hips, shoulders, groin, armpits, and neck
- Strengthen your thighs, calves, arches, back, shoulders, and arms
So, how do I get there?
- From Adho Mukha Svanasana (Downward Facing Dog), step your right foot up in between your hands. Or, from Tadasana (Mountain Pose), bend your knees and take a long step back with your left leg. Ensure your legs are hip-distance apart.
- Lunge into your front leg—bend your front knee to a 90-degree angle, while ensuring your stance is long enough that your front ankle lines up directly underneath your knee.
- Choose to lower your back knee (low lunge), or keep it lifted (high lunge). *If lowering your back knee bothers your knee joint, you can place a foam composite block underneath that knee, or fold your mat over to offer the joint extra padding.
- Press your front foot down strongly to lift your torso so that it's vertical, stacking your shoulders over your hips.
- Squeeze your inner thighs towards each other to press your right hip back and your left hip forward, so your hips are square.
- Root your tailbone, but lengthen up throughout your spine to the crown of your head.
- Reach your arms skyward, slide your shoulders back and down your spine, and fan your fingers out wide.
We hope this helps you better anjaneyasana, or crescent lunge pose. Please feel free to comment on our Facebook with any further questions. And let us know if you have something you would like to see featured in Foundation Friday!
Foundation Friday: Downward Facing Dog
This post is an instalment in a series that delves into the basics of yoga—looking at its postures (asana), breath (pranayama), philosophy, and all the other essentials—giving you the foundations upon which to build a solid practice. This post focuses on the ubiquitous downward facing dog.
Foundation Friday: Downward Facing Dog
Pose, or "Asana" Downward Facing Dog, or “Adho Mukha Svanasana” odd-oh mook-ah shvah-nass-ah-nah (not to be confused with savasana)
Why do we practice downward facing dog?
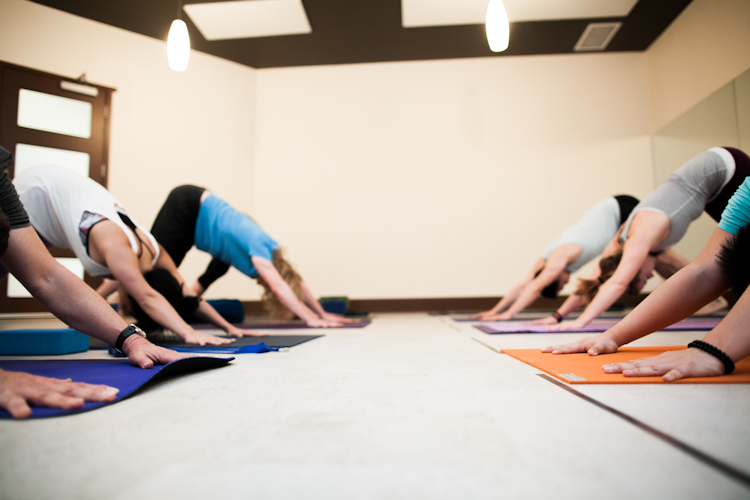
Downward dog is probably one of the most prevalent of all yoga postures. Though it may not feel like one when you first begin practicing, downward facing dog is actually a resting pose, and is often offered as a break between sequences, or as a starting and finishing point in a flow, or vinyasa. This pose will likely be taught in your first-ever beginner's class, and will carry you through as you advance your practice—downward dog is a quintessential pose, so it's important to get your alignment, er... down!
Downward dog may help…
- Calm the mind, relieving stress and mild depression
- Energize your body
- Stretch your shoulders, hamstrings, calves, arches, and hands
- Strengthen your arms and legs, which acclimatizing you to weight-bearing in your arms
- Improve digestion
- Offer relief for sinus pain, headaches, insomnia, back pain, and fatigue
- Ease conditions of menopause, high blood pressure, asthma, flat feet, and sciatica, and prevent osteoporosis
Traditional Chinese Medicine and acupuncture tend to favour Downward Facing Dog for its activation and extension of the Bladder Channel, the longest channel in the body. According to their perspective, elongating the spine throughout this posture aids in strengthening immunity, among a host of other benefits.
How do I get there?
- Start from a table top position, on your hands and knees. Place your hands slightly wider than shoulder distance apart and spread your fingers wide.
- Turn your hands so that the space between your pointer finger and your middle finger points to the top of your mat.
- Press down through the four corners of your hands, especially the mound of your thumb and pointer finger, while gripping your mat with your fingertips.
- Tuck your toes under, and press your hips up so that your body looks like an inverted pyramid from the side.
- Squeeze your forearms towards each other, and roll your upper arms away from each other.
- Ensuring your feet are hip-distance apart, take a soft bend into your knees and press your heart back towards your thighs.
- Roll your inner thighs back and wide behind you.
- Tilt your sitting bones skyward, and draw your tummy in towards your spine.
- Hug your shins towards each other, and press your heels down towards your mat (but it's okay if they don't touch!)
- Look between your feet, shins, thighs, or upwards at your belly.
If this position is uncomfortable, you can:
- Place your hands on blocks if your shoulders are quite tight
- Prop a towel, rolled mat, or some small sort of padding underneath your palms to alleviate pressure on your wrists
- Take a bigger bend into your knees if your legs are tight
- Support your head with a bolster or a block
- Or, start from standing with a wall or chair in front of you, then bend at your waist and press your palms into a wall or chair instead of the floor. Progress by walking your hands lower towards the earth as the posture becomes more accessible.
We hope this helps you better understand the concept of downward facing dog. Please feel free to comment on our Facebook with any further questions. And let us know if you have something you would like to see featured in Foundation Friday!
Categories
- Recipe 11
- Wellness 241
- Zen Habits & Inspiration 100
- Injury Prevention & Health 30
- Classes 1
- Yogalife Classes 7
- Prop Specific 1
- Studio Information 17
- Foundation Friday 25
- Physical Health 3
- Yoga Specific 54
- Curated Playlists 2
- Karma Program 5
- Staff Adventures & Journeys 10
- Anatomy & Information 30
- Community Event 15
- YEG Highlight 8
- Instructor Stories 22
- Yogi of the Month 13
- What's Going On 35
- Yogalife Workshops, Retreats & Trainings 37
- Relaxation 1
- Mental Health 2
- Workshops 34
- Registered Classes 4
- Pregnancy & Family 1
- Member Stories 5


